
The Log Cabin quilt is a classic of the art of quilting, known for its beauty and simplicity. The pattern is made up of a series of squares and rectangles sewn together in a spiral pattern that resembles a log cabin. Here is a step by step guide to help you create your own Log Cabin quilt without plagiarizing other content:
Necessary materials:
Cotton fabrics in colors of your choice
cutting ruler
rotary cutter
base for cutting
Sewing machine
Sewing thread
Needle for sewing machine
Acrylic or cotton blanket
sewing pins
fabric scissors
Iron
Step 1: Choose the size of quilt you want to make and cut the fabric to fit that size. Also cut the acrylic or cotton blanket to the same size as your quilt.
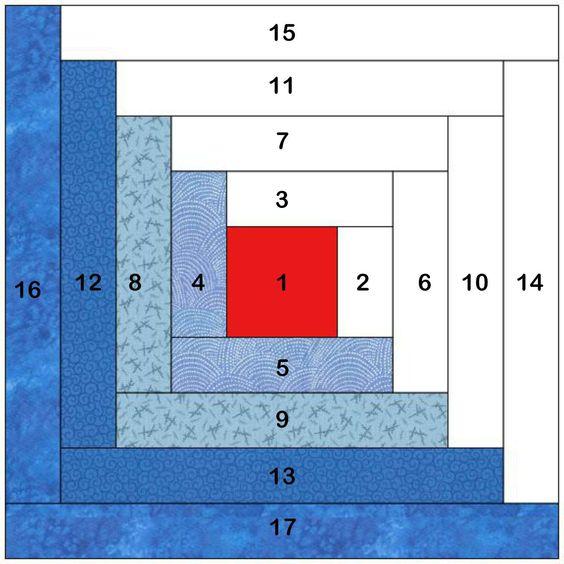
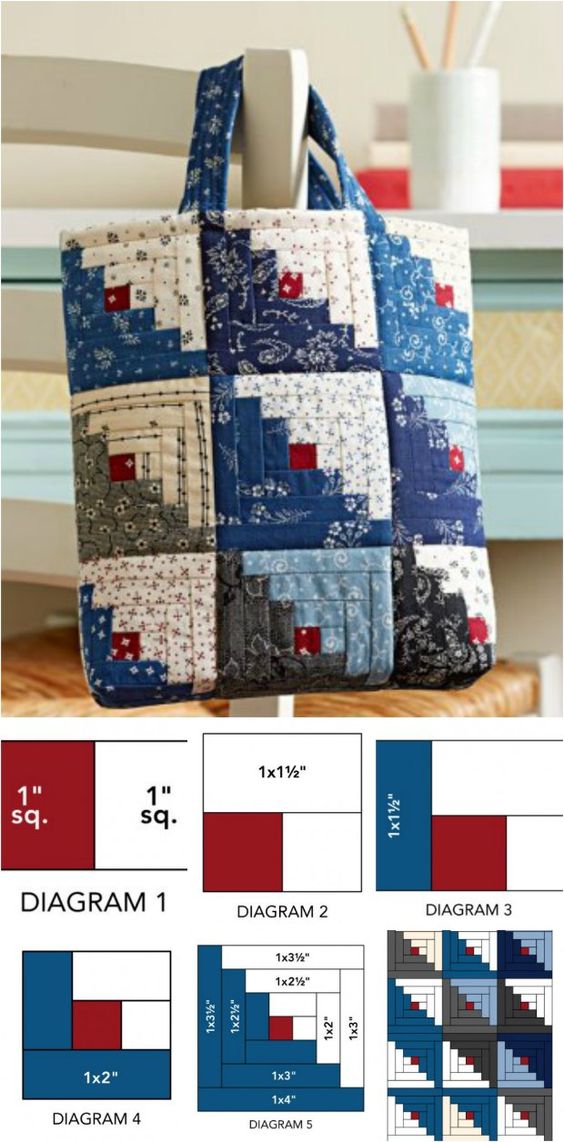
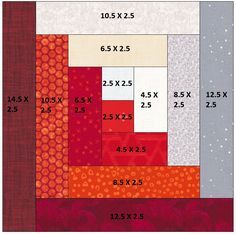
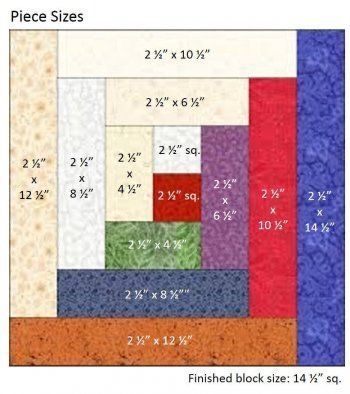
Step 2: Cut a square of fabric to be the center of your Log Cabin quilt. This square can be any size you like, but a good starting point is about 10cm.
Step 3: Cut a strip of fabric that is wider than the square from step 2. The strip should be about an inch longer on each side of the square. Place the fabric strip over the center square and sew it to the edge closest to the center.
Step 4: Turn the strip over and iron it. Trim the excess fabric from the strip, leaving about 0.5cm beyond the seam.
Step 5: Cut another strip of fabric, this time wider than the previous strip. It should be wide enough to cover the center square and the first strip, plus an inch on each side. Place the strip of fabric over the previous strip and sew it along the edge closest to the center.
Step 6: Turn the strip over and iron it. Trim the excess fabric from the strip, leaving about 0.5cm beyond the seam.
Step 7: Repeat steps 5 and 6, alternating stripe colors and widths, until your Log Cabin quilt is the desired length.
Step 8: Join all the sewn strips together to form the complete quilt. Make sure the edges line up correctly and use pins to secure them.
Step 9: Sew the edges of the quilt, using the sewing machine and matching sewing thread. Leave an opening on one edge so you can turn the quilt right side out.
Step 10: Turn the quilt right side out and flatten the edges with an iron. Close the opening with a straight seam, then sew around the outside edge of the quilt, about 0.5 cm from the edge, to secure the acrylic or cotton blanket to the inside of the quilt to ensure it is padded and comfortable. . If desired, you can also do a hand or machine quilting job throughout the quilt to add more texture and visual interest.
The Log Cabin quilt is a fun and rewarding project that can be tailored to suit your needs and color and pattern preferences. With this simple step by step and without plagiarizing other content, you can create a beautiful and cozy Log Cabin quilt to enjoy and share with your loved ones.
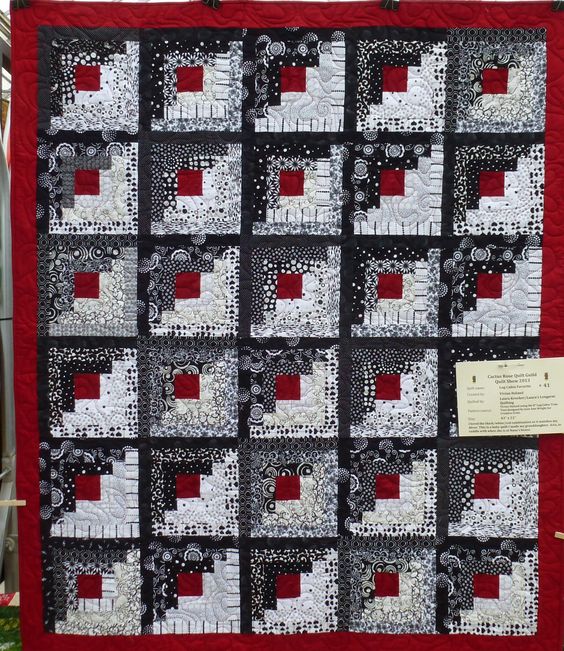
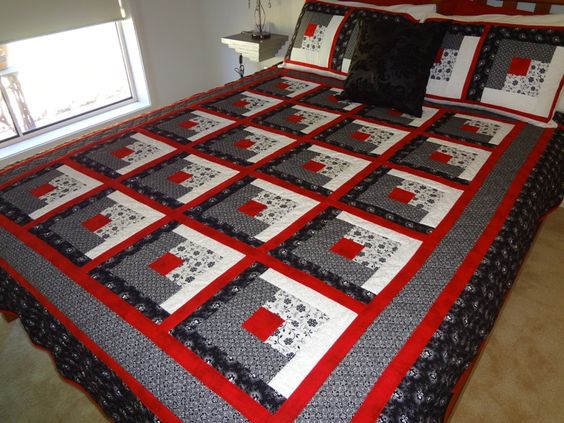
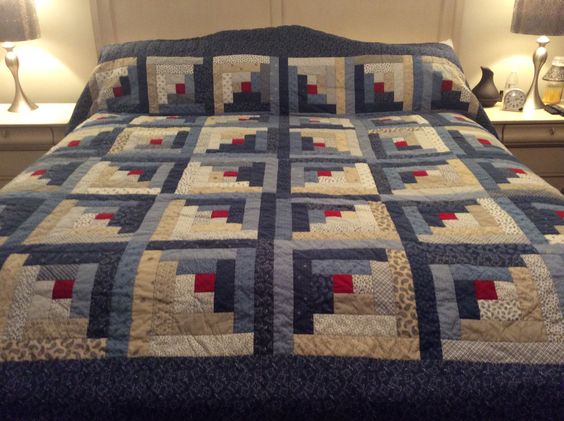
Inspirations and Ideas: