
Making a quilt is a fun and rewarding sewing project. It’s a great way to use up old fabric or leftovers from previous sewing projects. Here are some basic steps for making a patchwork quilt:
Materials: Fabric scraps (preferably cotton)
Fabric for quilt edge and back
Sewing thread
Sewing needle
Ruler
Scissors
Acrylic blanket or other material for filling the quilt
Sewing machine (optional)
Step 1: Cut fabric scraps into squares or rectangles. Make sure all pieces are approximately the same size. You can choose a standard size or make a more diverse quilt with different sized pieces.
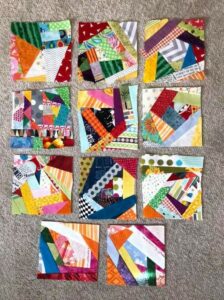
Step 2: Arrange the scraps on a table or on the floor until you find a combination of colors and patterns that you like. You can choose a specific color scheme or make a more eclectic quilt.
Step 3: Sew the scraps together to form rows. Then sew the rows together to form the quilt. You can sew by hand or with a sewing machine.
See also free pattern “Twirling Ornaments Wall Hanging”
Step 4: When your quilt is complete, cut a piece of fabric for the edge of the quilt and back. Make sure the size is large enough to cover the back of the quilt and fold over to form the edge.
Step 5: Lay the edge fabric right side down on the quilt. Pin the edges together with pins and sew around the entire edge.
Step 6: Cut a piece of acrylic batting or other quilt filling material that is the same size as the quilt front. Place the stuffing between the edge fabric and the quilt. Pin and sew around the edges of the quilt.
Step 7: Once you’re done sewing, turn the quilt right side up and admire your work! If you prefer, you can quilt the quilt for an even cozier look.
See also free pattern “Twirling Ornaments Wall Hanging”
Making a patchwork quilt can take some time, but it’s a fun sewing project and a great way to use old fabric or leftovers from previous sewing projects. With patience and dedication, you can create a beautiful quilt that will be treasured for years to come.